Saving and recording an individual feed
Each camera feed has some control buttons which enable the user to perform specific actions. The following are the options available to control an individual feed.
For N3N, click
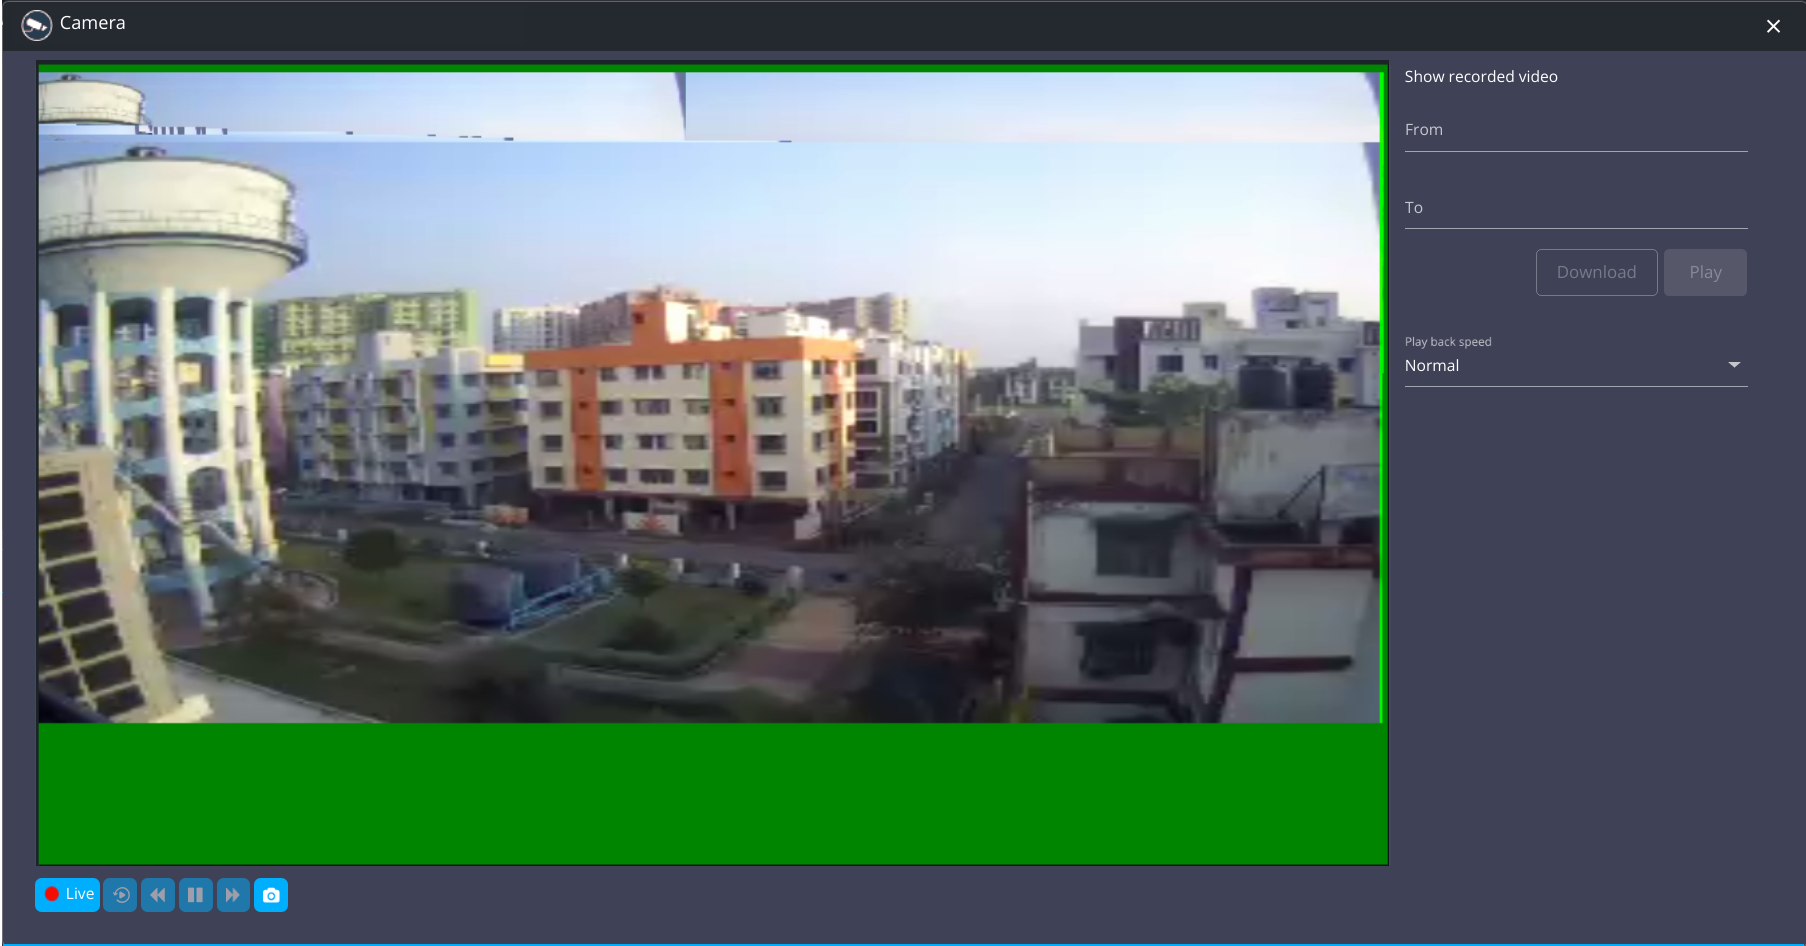
 to open the feed with options of Live video, Play/Pause, Rewind, Forward, Stop and Screenshot.
Also, you can play and download the recorded video for a particular time period by selecting the desired date and time in the From and To fields then selecting the play back speed from the values in the Play back speed drop-down.
For QVMS, click
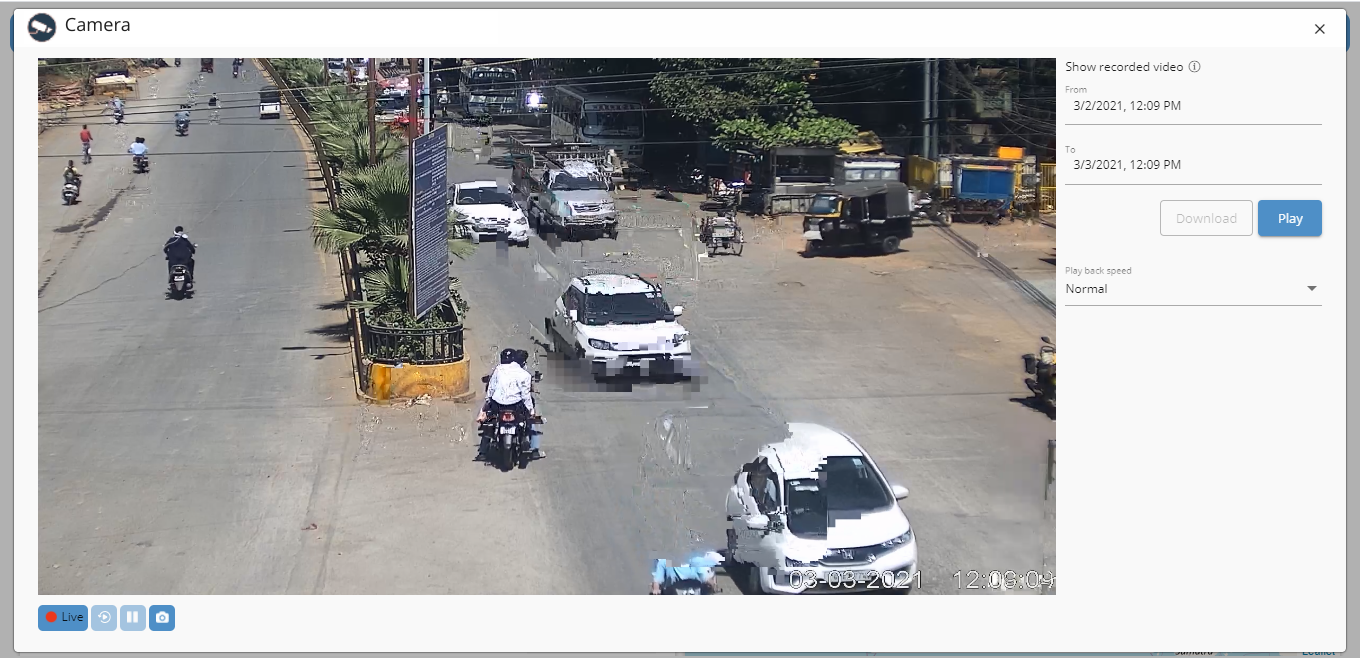
to open the feed with options of Live video, Play/Pause, Stop and Screenshot.Also, you can play and download the recorded video for a particular time period by selecting the desired date and time in the From and To fields then selecting the play back speed from the values in the Play back speed drop-down.
Note
For playback, the difference between the From and To fields must be greater than or equal to 1 minute.
For downloading, the difference between the From and To fields must be between 1 and 30 minutes.
Click
 to get detailed information about the feed.
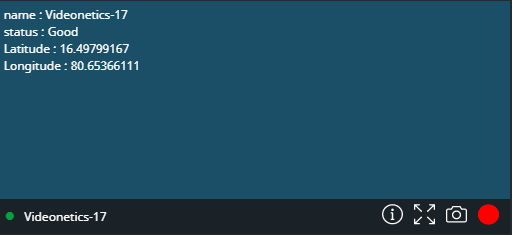
For N3N, click
 for the detailed view of the feed in an adjacent tab. This view allows the user to control the focus of the displayed feed.
For QVMS, click
 to view the feed in a dialog and allow the user to control the focus of the displayed feed.
Click
 (for N3N) or
  (for Kurento and QVMS Bridge).
For N3N, a destination folder 'N3N' should be created in C: drive of the system prior to taking the snapshot. For Kurento and QVMS Bridge, the snapshot will be saved in your downloads folder.
Note
N3N is supported on systems running the Windows operating system and in the Chrome browser only. Other operating systems and browsers are not supported.
A snapshot of the current feed is captured and will be stored in the created destination folder. A success message is displayed.
For QVMS Bridge, if Create Event has been selected in Configure VideoWall widget features, a confirmation dialog is displayed for you to choose if you only want to Download the snapshot or Create Event as well with the snapshot.
Note
This confirmation dialog is not displayed if you are in the Settings view.
If Create Event has been selected, the snapshot of the current feed is downloaded as well as the manual New Event panel is displayed with the snapshot attached and with the following properties pre-populated:
Setting
Description
Domain
The Default Domain selected in Configure VideoWall widget features.
Event Source
The Default Event Source selected in Configure VideoWall widget features.
Event Description
The name of the camera.
Criticality
The importance of the event is set as High.
latitude
The latitude of the camera.
longitude
The longitude of the camera.
Select the Event Type and click Create to create the event and it is created and can be seen in Events.
Click
 .
.For N3N, a destination folder 'N3N' should be created in C: drive of the system prior to recording the feed. For Kurento, the recording of the feed will be saved in your downloads folder.
Recording of the feed begins.
Note
N3N is supported on systems running the Windows operating system and in the Chrome browser only. Other operating systems and browsers are not supported.
Click
 .
.Recording of the feed stops and will be saved in the destination folder. A success message gets displayed when the video file gets saved.
For QVMS Bridge, if Create Event has been selected in Configure VideoWall widget features, a confirmation dialog is displayed for you to choose if you only want to Download the recording or Create Event as well with the recording.
Note
This confirmation dialog is not displayed if you are in the Settings view.
If Create Event has been selected, the recording of the feed is downloaded as well as the manual New Event panel is displayed with the recording attached and with the following properties pre-populated:
Setting
Description
Domain
The Default Domain selected in Configure VideoWall widget features.
Event Source
The Default Event Source selected in Configure VideoWall widget features.
Event Description
The name of the camera.
Criticality
The importance of the event is set as High.
latitude
The latitude of the camera.
longitude
The longitude of the camera.
Select the Event Type and click Create to create the event and it is created and can be seen in Events.