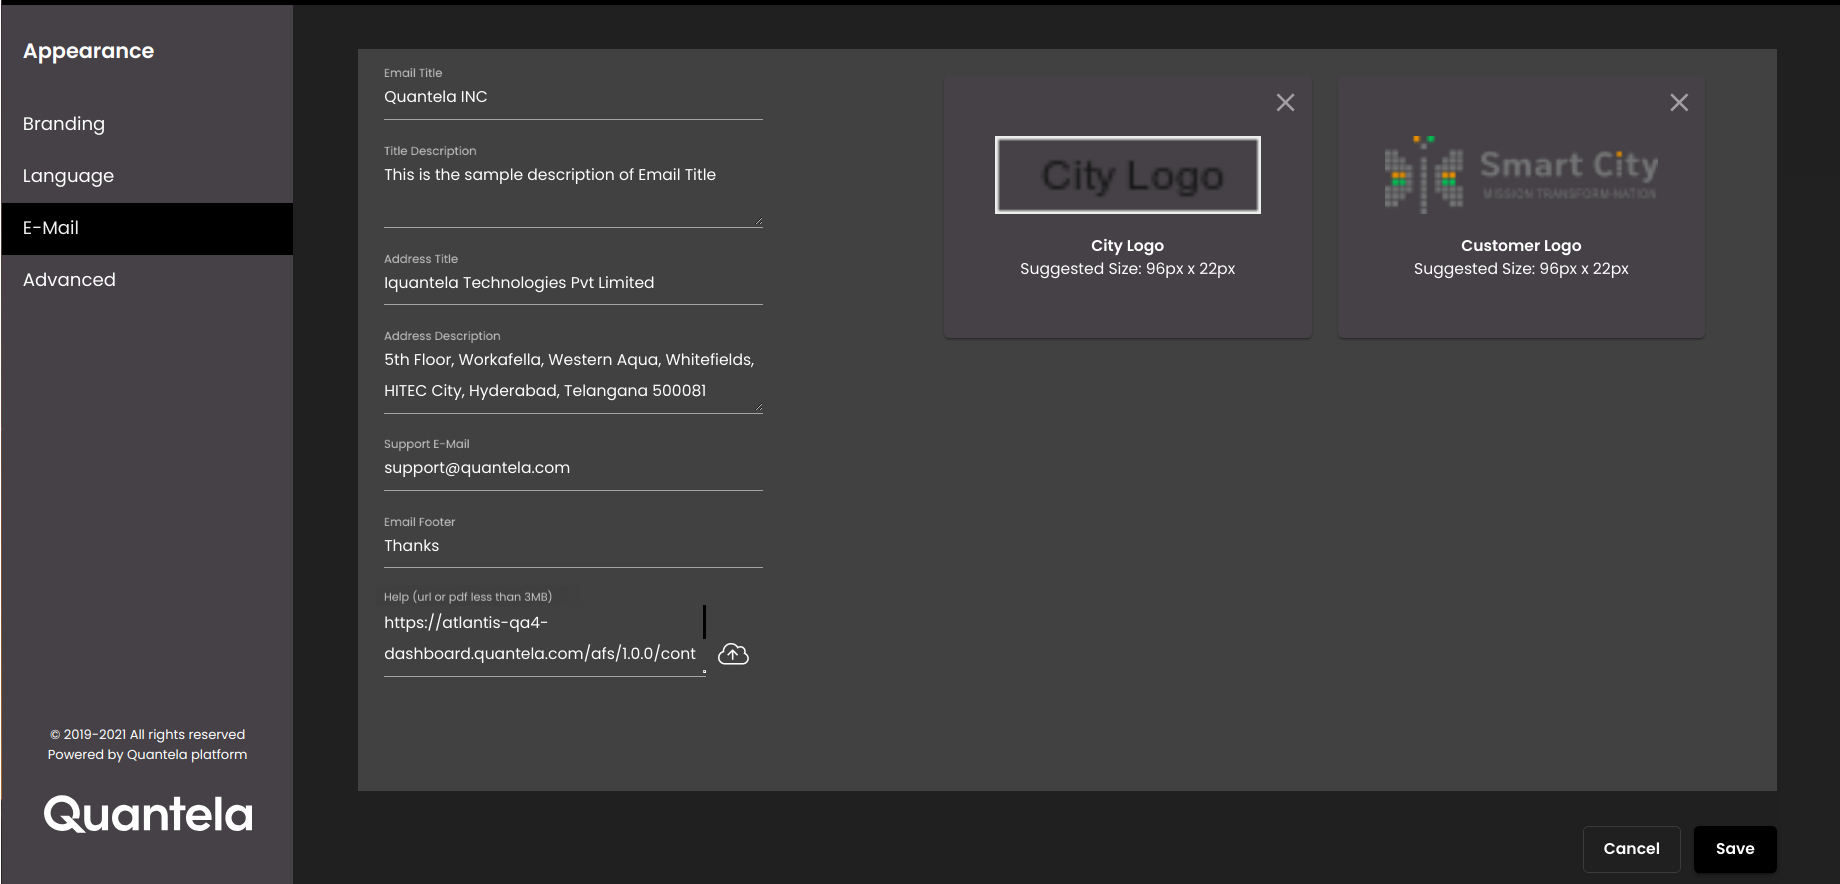
Configure E-mail settings
The email settings are used in the emails that are sent when a new user is created, during password recovery, in SOP, Data API and Webhook access email notifications.
In the top left-hand corner of the main dashboard screen, click the Admin Panel icon:
 .
.On the Admin Panel, click Appearance
 .
.On the Appearance screen, in the menu on the left-hand side of the screen, select E-Mail.
Configure the settings as required:
Setting
Description
Email Title
The title of the email. This is the text that is displayed at the top of the email.
You can mention the product name here.
Title Description
The description of the email title. This is the text that is displayed below the Email Header Logo.
You can mention a short description of the product here.
Address Title
The title of the address. This is the text that is displayed at the bottom of the email, above the Address Description and Email Footer.
You can mention the company name here that developed the product.
Address Description
The description of the address. This is the text that is displayed at the bottom of the email, below the Address Title and above the Email Footer.
You can mention the address of the company here that developed the product.
Support E-Mail
The support email address. You can mention the contact email address here to be used to email in case of queries.
E-mail Footer
The footer for the email. This is the text that is displayed at the bottom of the email.
Help URL
The URL to the help guide or a PDF of the help guide. You can provide a URL or can upload a PDF locally from your system.
Note
If you upload a PDF, the size of it must be less than 3 MB.
If you have the help guide in different languages, you need to give the URL without the
/?lang=<HTML language code>so that it changes based on the language selected in the Default Language drop-down in the Advanced tab.If you have the help guide only in a specific language, you need to give the URL with the
/?lang=<HTML language code>.
City Logo
The logo of the city. It is displayed at the top-right corner of the email.
You can upload an image to be used for the city icon by browsing for an image file locally from your system, or you can remove the existing city logo by clicking on the Remove Image icon:
 .
.Note
For better performance, the size of the image file should not exceed 500 KB.
The recommended size of the image is 96*22 px and needs to be in the PNG format only.
Customer Logo
The logo of the customer which is shown at the top-left corner of the email.
You can upload an image to be used for the customer logo by browsing for an image file locally from your system, or you can remove the existing customer logo by clicking on the Remove Image icon:
.Note
For better performance, the size of the image file should not exceed 500 KB.
The recommended size of the image is 96*22 px and needs to be in the PNG format only.
Click Save.