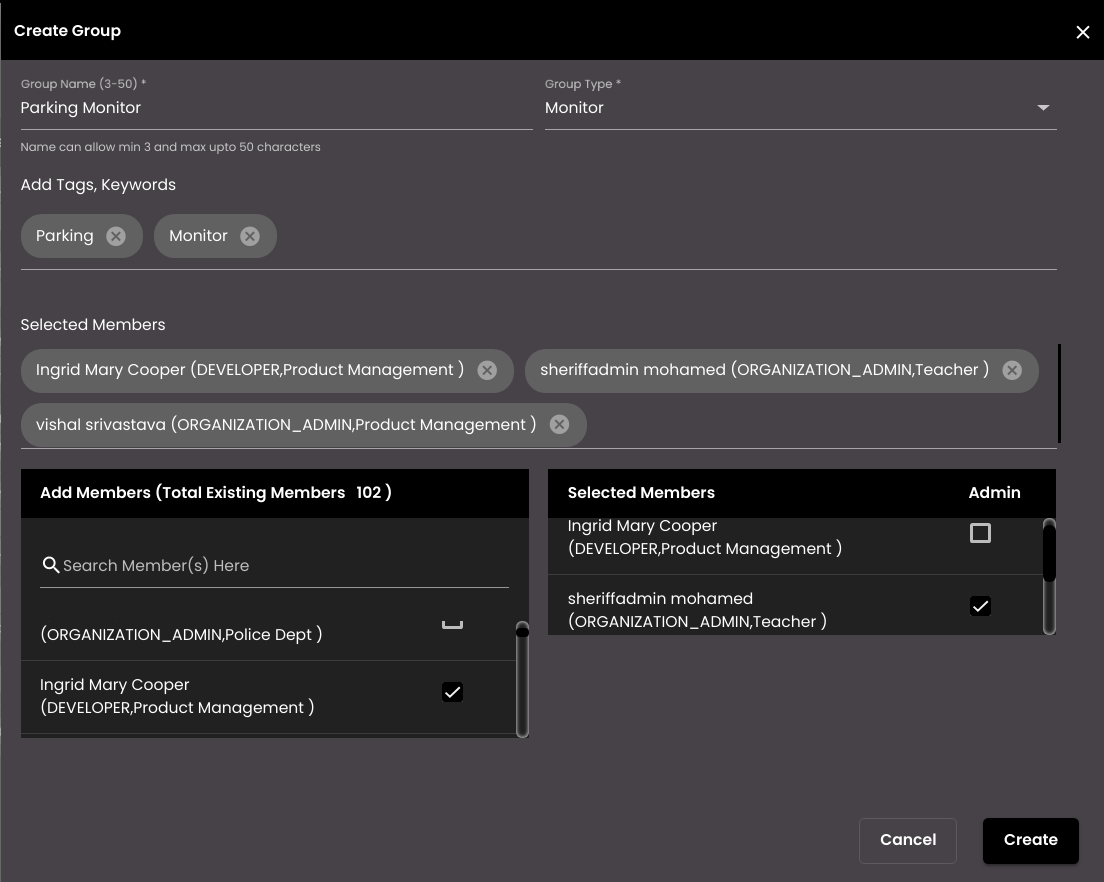
Create a group
In the top left-hand corner of the main dashboard screen, click the Admin Panel icon:
 .
.On the Admin Panel, click Users
 .
.On the right-hand side of the Groups screen, click the Group icon:
 .
.Enter a descriptive name for the group. This is the name that will be shown in the list of groups.
Note
It must be 3-50 characters only.
Select one of the following for the Group Type:
Primary - this is a group of users who will be responsible for managing and completing tasks.
Monitor - this is group of users who will be notified of a task and will be able to monitor its progress, but will not be able to complete the task.
Add one or more Tags or Keywordsto help identify the group. Hit Enter or Tab on the keyboard after typing the tag descriptor or keyword to add it to the list.
Add one or more Members to the group from the list of available users.
Select which members of the group should be designated as Admin. This is the user who will initially receive the notification, and he/she can assign it to other members of the group.
Press the Create button at the bottom of the screen to save the group.