Create an event type
In the top left-hand corner of the main dashboard screen, click the Admin Panel icon:
 .
.On the Admin Panel, click Definitions
 .
.On the right-hand side of the Events screen, click the New Event icon:
 .
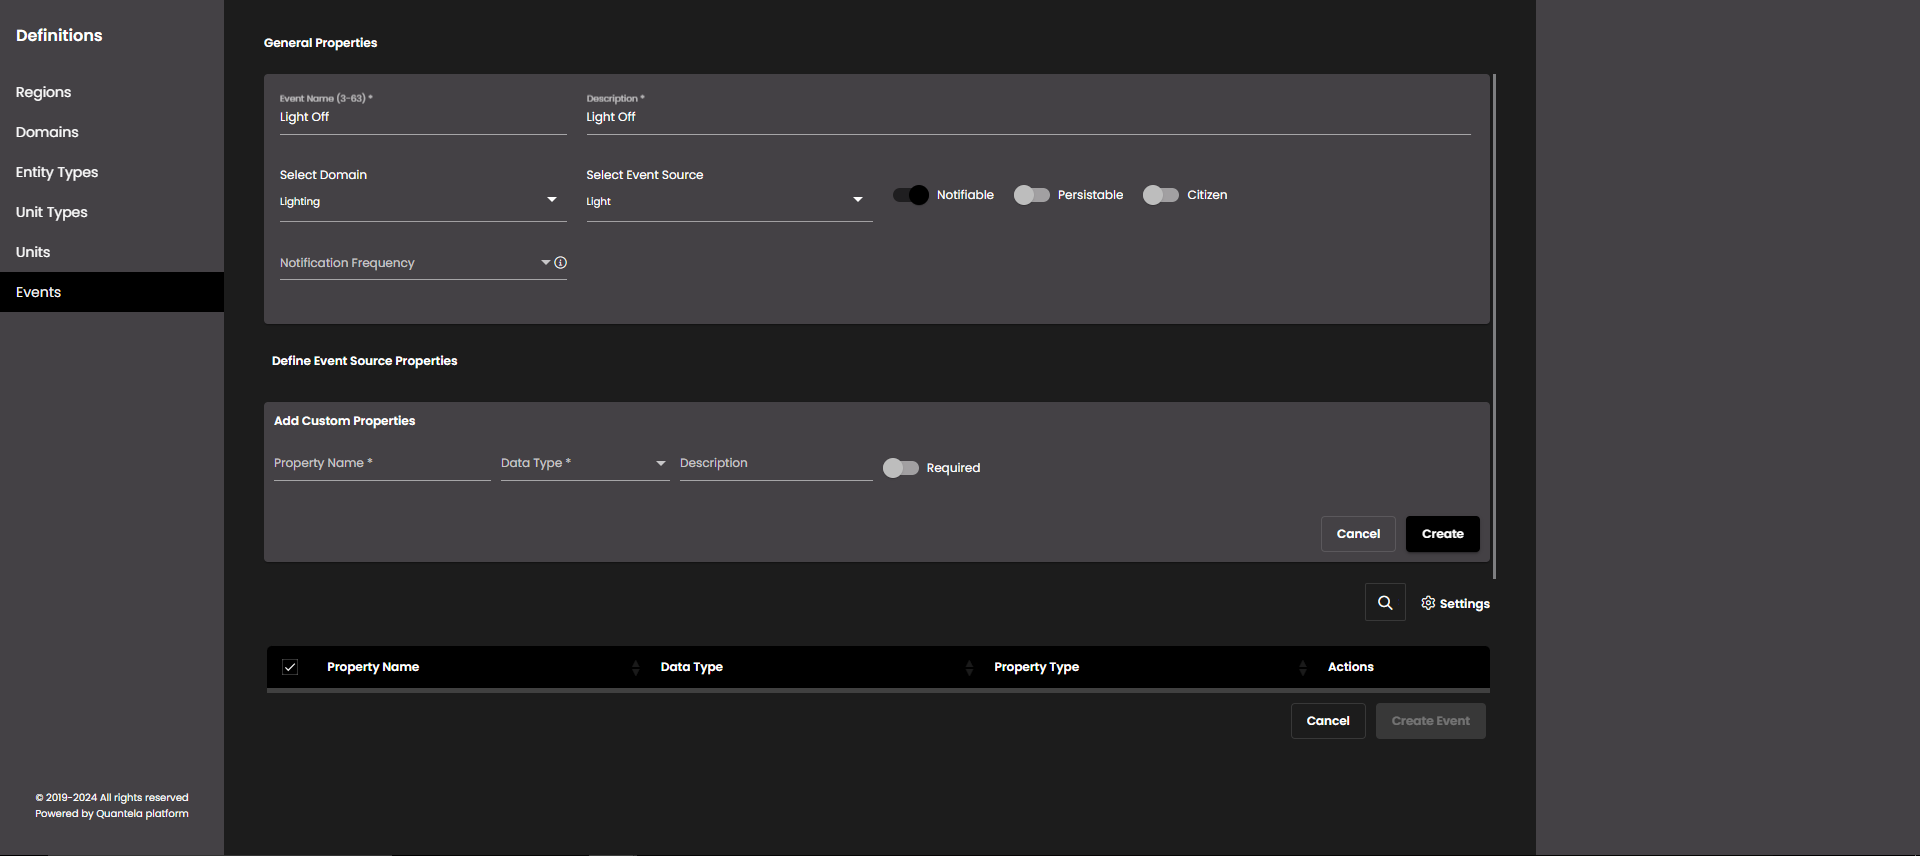
.Enter a description name for the event in the Event Name field. This name will be displayed in the list of events and can be used to search for the event.
Note
It must be 3-63 characters only.
Enter a description for the event in the Description field. This would be displayed in the list of events and can be used to search for the event.
You can optionally select a specific domain to be associated with this event in the Domain field. If you specify a domain then this event can only be used with automation rules that are triggered from this domain (TBC).
If you have selected a domain, then you can also optionally select a specific Event Source associated with this domain. This will determine which entity properties are associated with the event. For example, if the event is to be triggered by a car park becoming full then you may want to record properties associated with this entity, such as the total car-park capacity and the number of free spaces.
If this event is to be used to generate dashboard notifications then select the Notifiable option.
If this event is to be stored in the Quantela platform database for historical analysis and reporting then select the Persistable option.
If this event should be sent to the optional Quantela Citizen mobile application then select the Citizen option.
Recurring events are merged under a single event (For more information, see Events.) until they reach to a Closed state. Notification Frequency is used to control the frequency of (recurring) child event notifications. It is displayed in Minutes or Hours and when Notifiable option is enabled.
If you have selected a specific event trigger then the default properties associated with this event will be displayed in the Event Source Properties list. You can't change these default properties, but you can select which ones - if any - are to be recorded with this particular event.
In addition to the default event trigger properties, you can add custom properties that are to be stored with this event. To add a new property, click the Add Property button and enter the following details:
Setting
Description
Property Name
The name to be used for this property.
Data Type
Select one of the following standard data types for the property:
String
Boolean
Date
Number
dateRange
numberRange
object
point
polygon
lineString
multiPoint
multiLineString
multiPolygon
geometryCollection
ipRange
ip
text
Default Value
Provide an optional default value to be used for this property.
Description
Enter an optional description for this property.
Required
Specify if a value for this property must be provided for every event of this type.
Click the Create button to add this custom property to the event.
When you have configured the event, in the bottom right-hand corner of the canvas, click Create Events to save it.