Configure map layers
In addition to the base map that is displayed by the map provider, you can configure one or more layers which the dashboard user can choose to overlay on the map. There are two types of layers:
A Feature Layer consists of static geographical features such as cities, roads and buildings. Features can be points, lines, or polygons (areas). Feature layers are most appropriate for visualizing static data on top of the base map.
A Dynamic Layer is an overlay with dynamic content that is rendered by the service provider, such as animated graphics or interactive content.
To review, create or update the map layer settings, first navigate to the Map Layers settings page as detailed below:
In the top left-hand corner of the main dashboard screen, click the Admin Panel icon:
 .
.On the Admin Panel, click the Maps icon:
 .
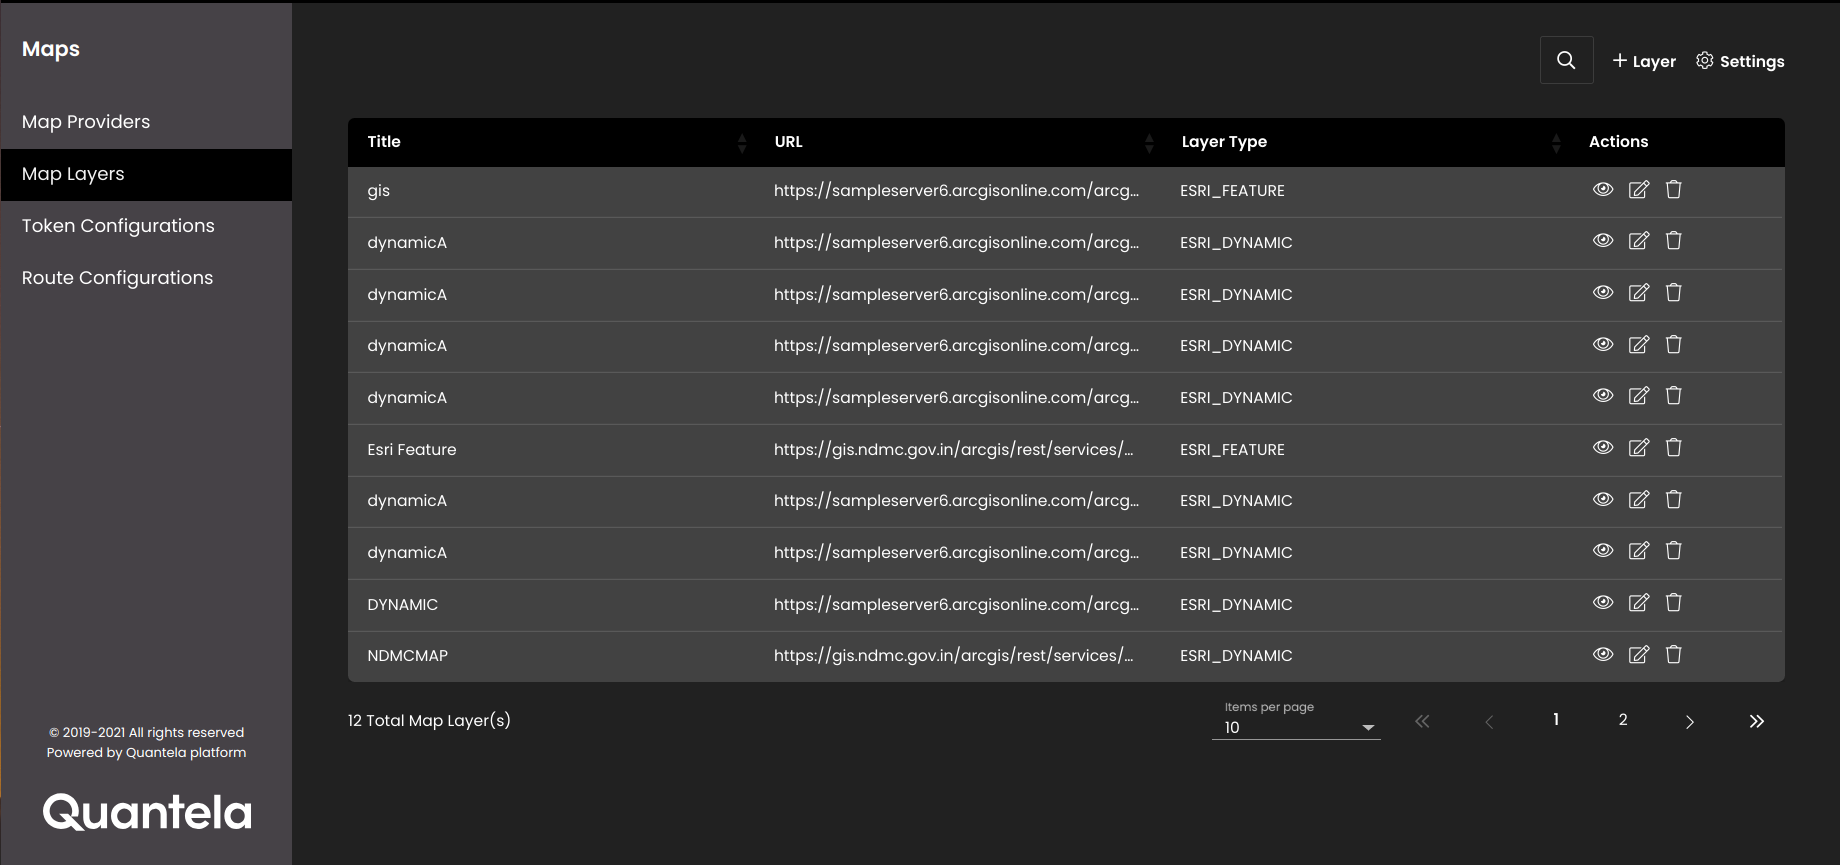
.Select Map Layers.
Click on the Layer icon
 to add a map layer.
Configure the settings as required:
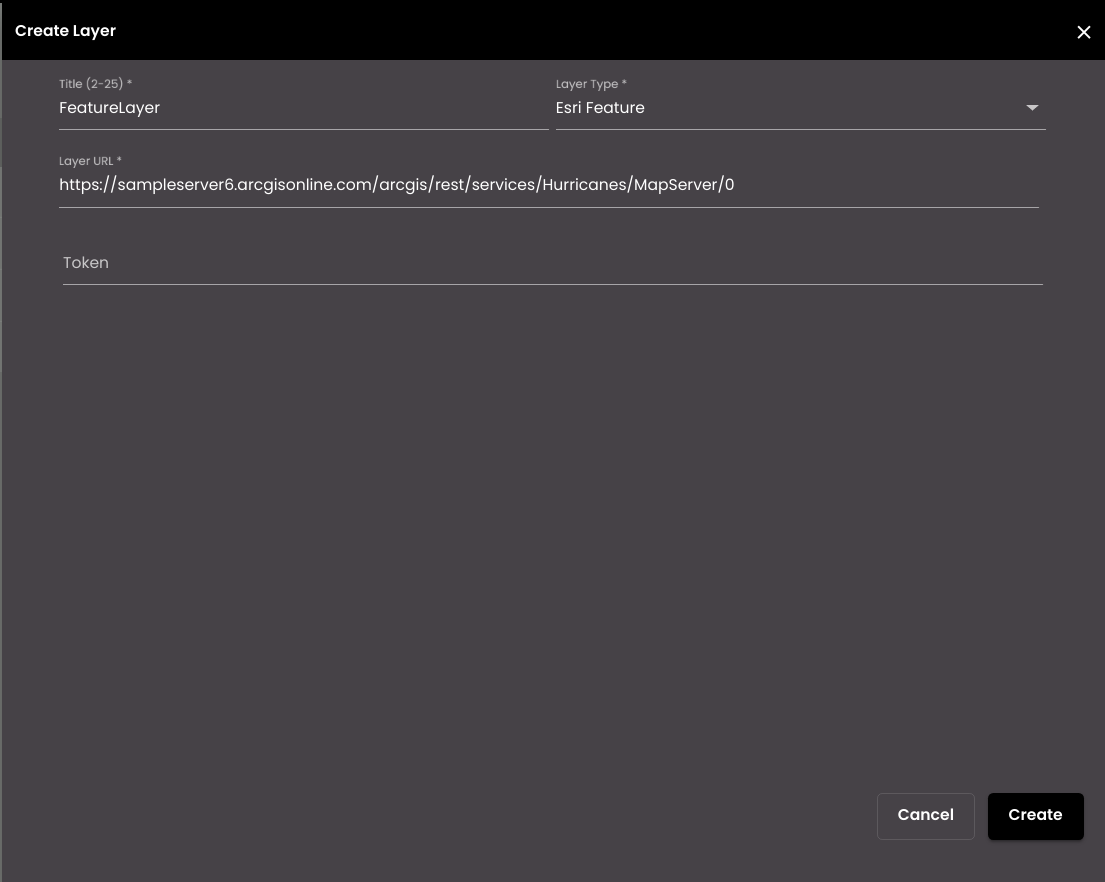
Setting
Description
Title
The title of the layer URL.
Note
It must be 2-25 alphabetic characters only.
Layer Type
Type of map layer. You can select any one of the types of layers Esri Dynamic or Esri Feature from the drop-down menu.
Layer URL
The URL of the layer.
Token
The token for the map layer.
Click Create.
You can also view, edit and delete the map layers:
Click on the View
 icon to view the map layer.
Click on the Edit
 icon to edit the map layer.
Click on the Delete
 icon to delete the map layer.
Note
The map layer added here will be displayed in the Layer Title drop-down in the Settings tab of Map widgets. You can see it in the section Configure map widget settings.