Create an escalation rule
In the top left-hand corner of the main dashboard screen, click the Manage icon:
 .
.On the Manage panel, click Automation
 .
.On the right-hand side of the Escalation Rules screen, click the Escalation Rule icon:
 .
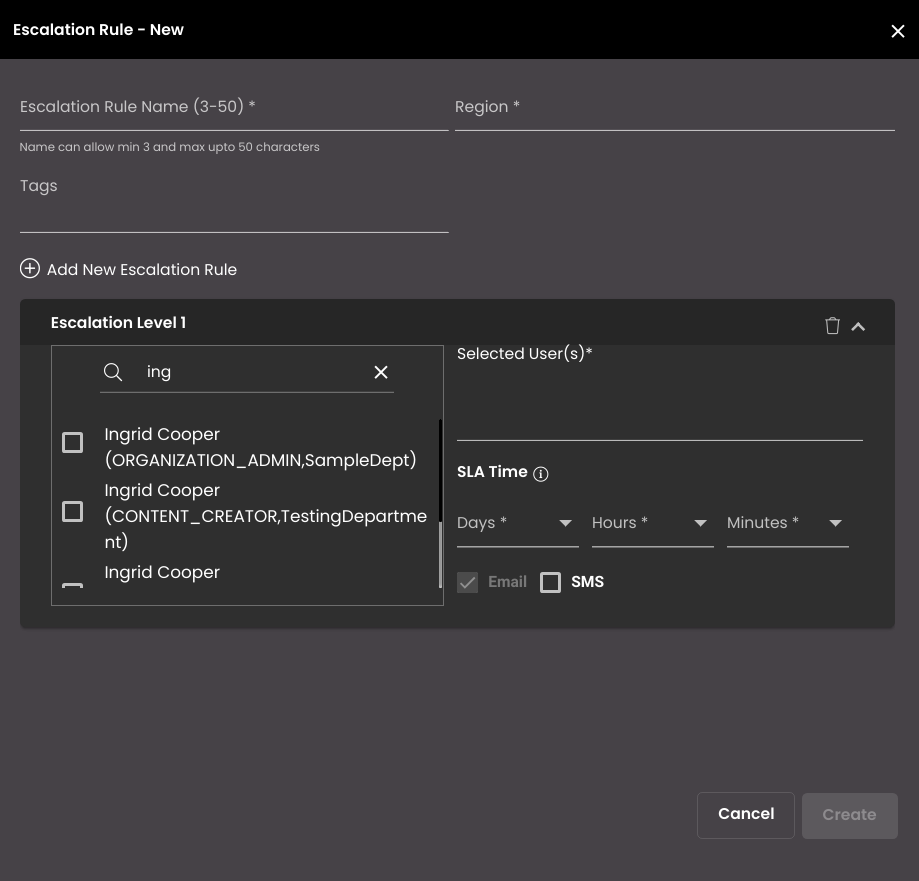
.Enter a descriptive Escalation Rule Name for the escalation rule. This is the name that will be shown in the list of escalation rules.
Note
It must be 3-50 characters only.
Select a pre-configured geographical Region from the list. The rule will only be applied to events that originate from this region.
Enter one or more descriptive tags for the escalation rule. Hit Enter on the keyboard after typing the tag descriptor to add it to the list.
Click Add Escalation Rule to add an escalation level.
Note
You can add at most five escalation levels for an escalation rule.
Click on the escalation level to configure it. You can click on the
 icon to delete the corresponding escalation level.
Select a pre-configured user from the Selected User(s) list. These are the user(s) who will receive an email notification, dashboard notification and SMS when the SLA has been crossed.
Select the SLA Hours and SLA Minutes- this is the Service Level associated with the escalation. It specifies the time period in hours and minutes respectively during which the SOP should be completed.
Note
The minimum SLA that can be set is 10 minutes.
Press the Create button at the bottom of the panel to save the escalation rule.