CMS
Content in Quantela Citizen is arranged into Categories and Modules. Each individual CMS module has an icon that would be displayed in the corresponding category within the mobile app. Any number of modules can be created, and the layout and content of each is fully configurable. The Quantela platform administration dashboard provides an easy facility to create and manage modules, as illustrated below.
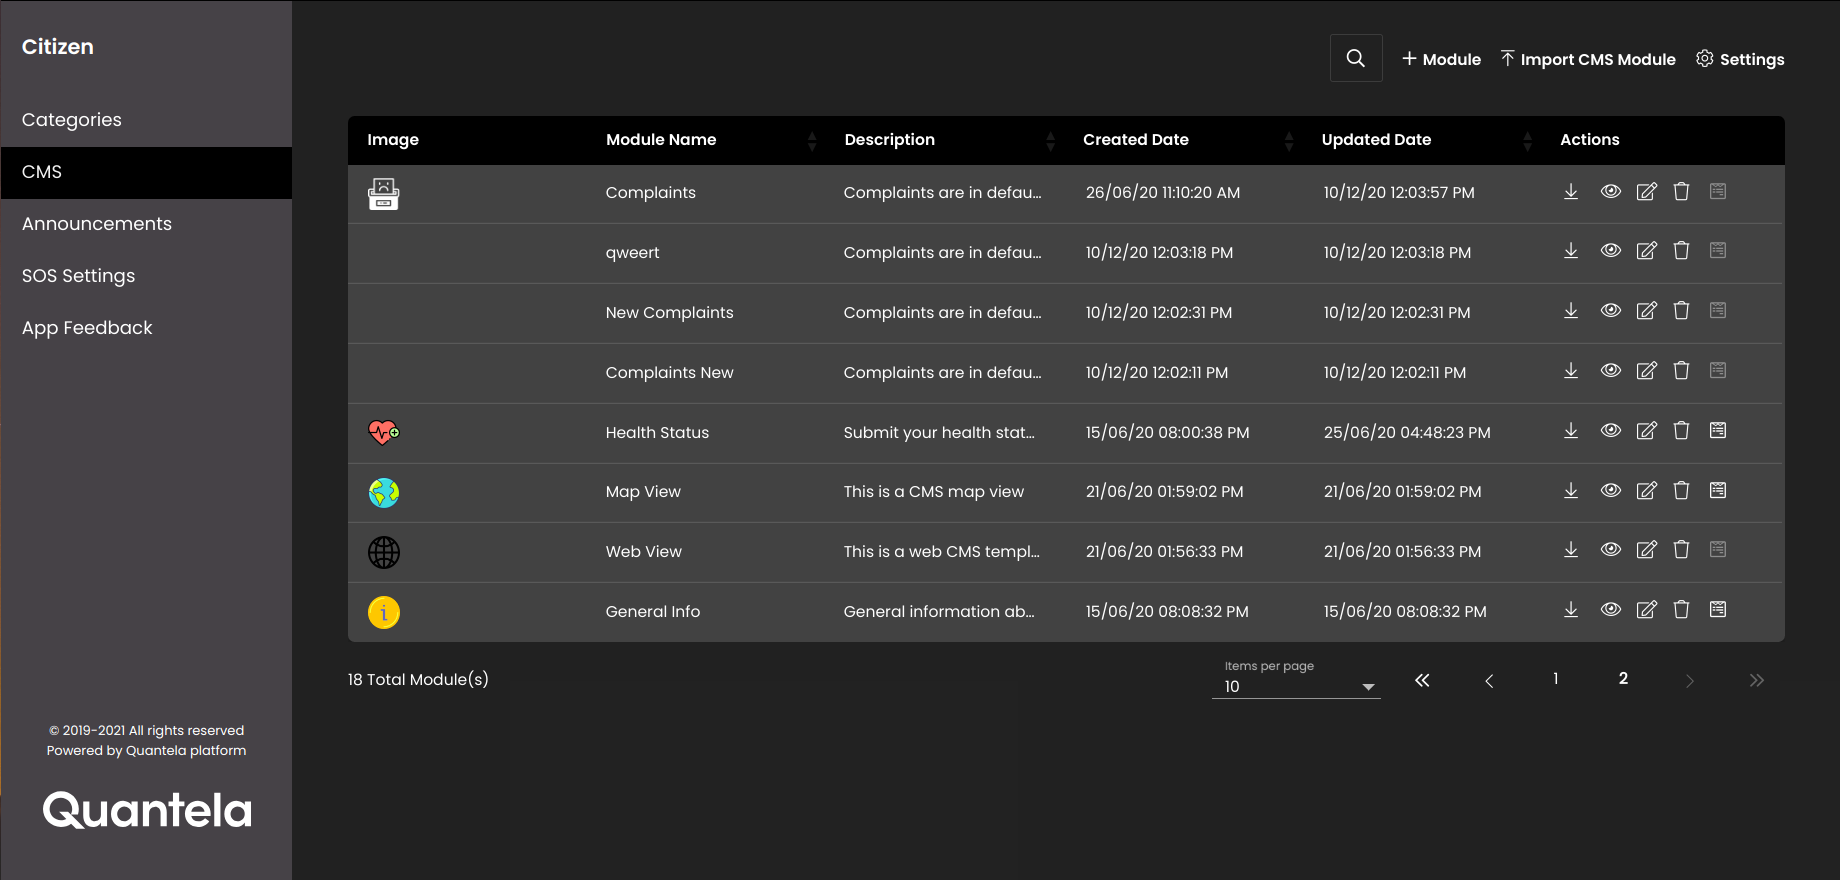
To review or update the available CMS modules, first navigate to the CMS page as detailed below:
In the top left-hand corner of the main dashboard screen, click the Manage icon:
 .
.On the Manage panel, click the Citizen icon:
 .
.Select CMS.
Depending on your permissions, you can create a new CMS module as follows:
Click the Module button:

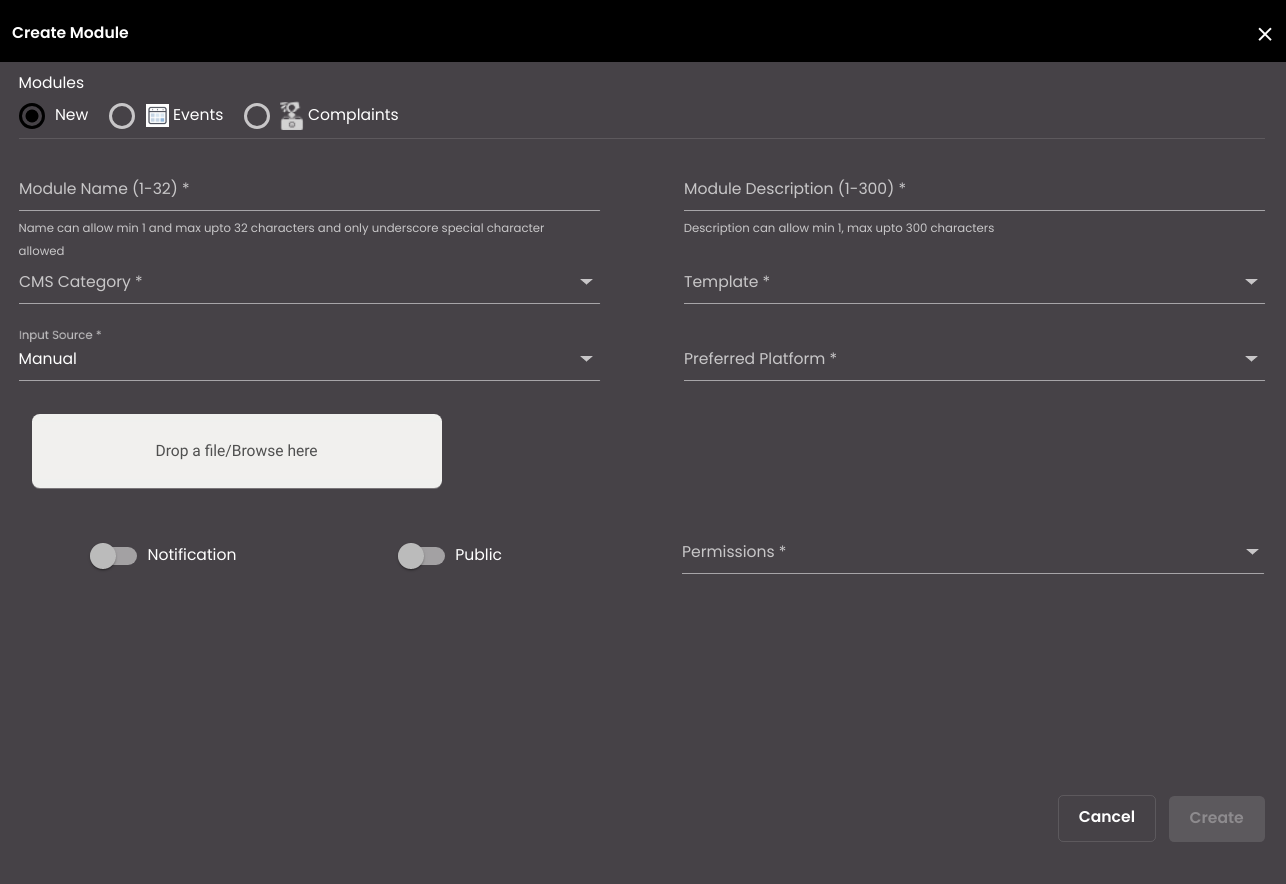
Edit the configuration settings for the new module:
Setting
Description
Modules
The type of CMS modules which you can create. The options are as follows:
New - creates a CMS module other than the Complaints module.
Complaints - creates a CMS module to enable citizens to raise grievances from the Citizen mobile app. This is a pre-defined module template specific for registering grievances.
Module Name
Enter a descriptive name for the CMS module. Names should only contain alphabetical characters, and should be between 4 and 100 characters in length. This name would be displayed on the Citizen mobile/web application.
CMS Category
Select a previously configured CMS Category for the module.
Input Source
Select what type of content should be displayed in this module:
Manual - the content will be defined in a Form. You will have to configure the layout of the form as described below.
Note
It cannot be edited if the Modules selected is Complaints.
File
Select an icon that would represent this CMS module in the Citizen mobile/web app. Icons should be transparent images with recommended dimensions of approximately 120 x 120 pixels.
Module Description
Enter a longer description of this module, up to 300 characters.
Note
It cannot be edited if the Modules selected is Complaints.
Template
Select one of the following content templates:
City Contacts
Details
Environment
Events
Graphs
LIST-MAP
Lighting
List
List and Map
Map
News
Parking
Sub HTML
Weather
Web
Web Links
Note
It cannot be edited if the Modules selected is Complaints.
Preferred Platform
Select which Citizen platform(s) this module should be available on:
Mobile
Web
Mobile and Web
Note
It cannot be edited if the Modules selected is Complaints.
Notification
If enabled, CMS notifications are sent to the Citizen app.
Public
If enabled, no permissions are required to access the CMS module and it's content.
Permissions
If Public is disabled, you should select the Create, Update, Delete or View permissions for the CMS module.
Click the Create button.
To edit an existing CMS module, select the module from the list and click the corresponding Edit icon:  .
.
To delete a CMS module, select it from the list of existing modules and click the corresponding Delete icon:  .
.
Likewise, to export a CMS module, select it from the list of existing modules and click the corresponding Export icon:  . The CMS module is downloaded as JSON code on your computer.
To import a CMS module, on the right-hand side of the CMS screen, click the Import icon:  . From the Select File option, select the JSON file for a previously exported CMS module. If required, change the properties in the General Properties tab.
Note
If the imported CMS module has the same Module Name as an existing CMS module in the modules list, you need to change the Module Name to one that is not present in the existing modules in order to import it.
If the CMS module has sub modules or dependent forms associated with it, they need to be imported separately.
Form Builder
The layout and content of each module can be designed in a drag & drop form builder. The user can drag various UI input components to the screen, then position them and configure them as required. The Text Input and Text Area UI components have configurations regarding length and allowed characters. The Phone Number, File Upload and Date components have configurations regarding length, size and 'From' and 'To' dates respectively. The content displayed in a CMS module can include static images and text, maps, dynamic data from the Quantela platform, newsfeeds, URLs and links to other apps. CMS modules can also include forms to gather input from the app user. Forms can be used by the mobile app user to report complaints or incidents along with the corresponding GPS coordinates and other media such as images. These user reports can then be used to generate events and trigger workflows within the Quantela platform.
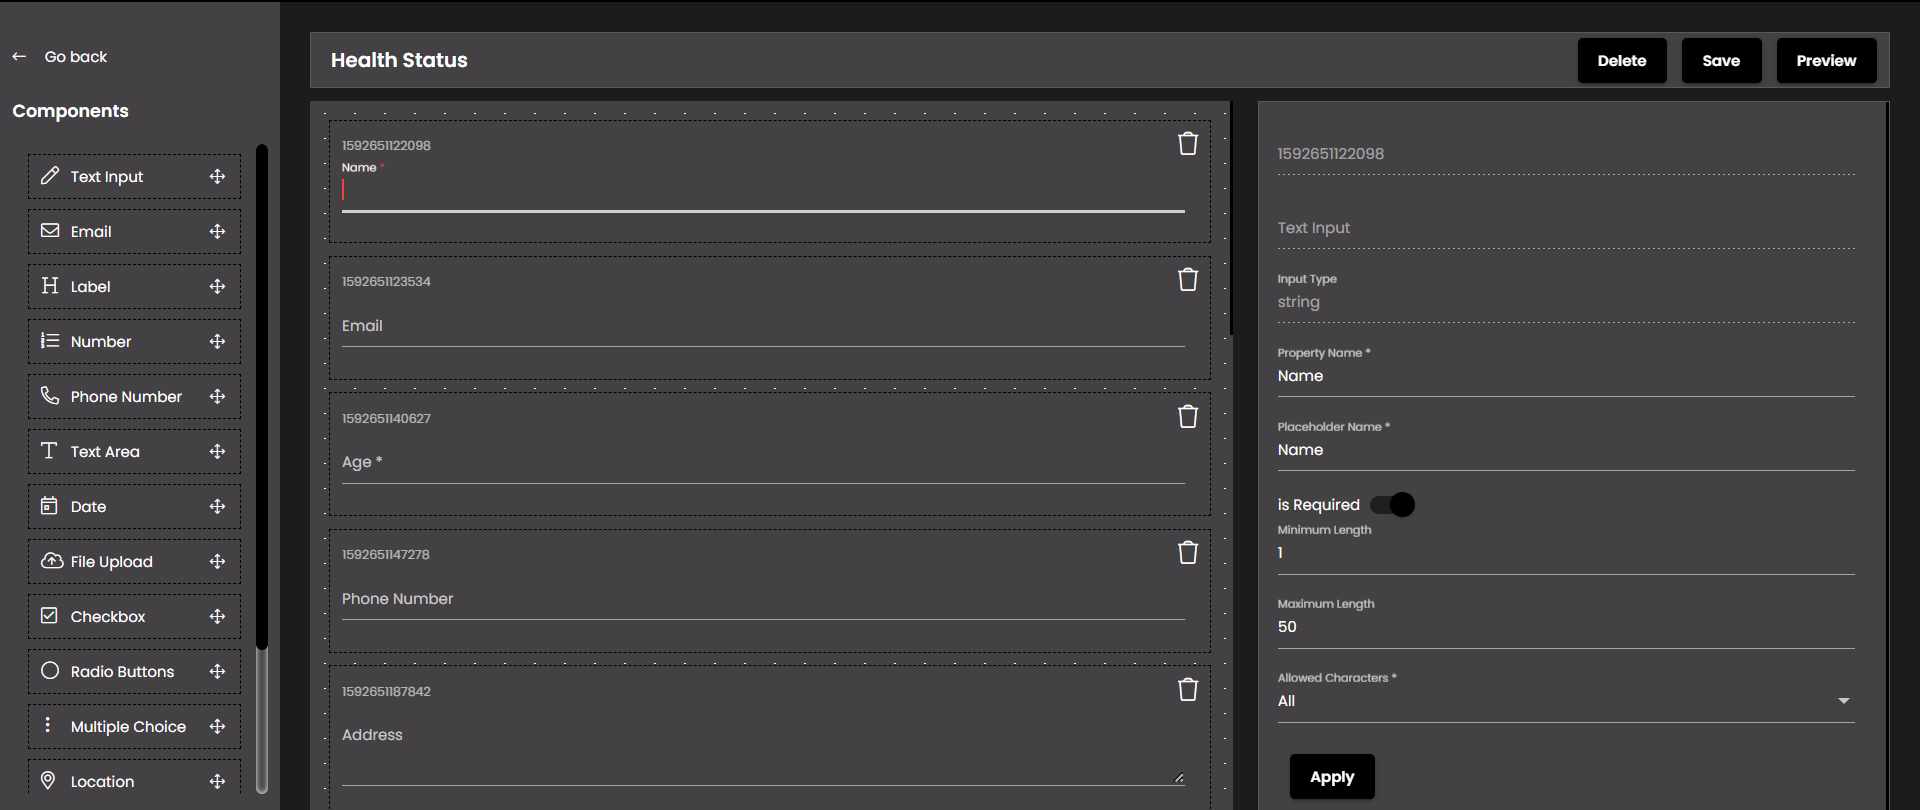
If a module has been configured to have a Manual input source, then you can build a Form to define the layout of the module as described below:
Identify the module to be configured in the list of CMS Modules.
Click the Build Form icon to the right of the module details:
 .
.Drag form components from the palette on the left and position them on the form-builder canvas in the center of the screen.
Configure each component by entering the required details in the configuration panel on the right of the screen, then clicking on the Apply button.
Click on the Preview button on the top-right of the screen to see how the form will appear to the user.
Click on the Save button to save the module configuration to the database.
Click on the Delete button to delete the module configuration from the database.
Also depending on your permissions, you can create a new CMS sub module or dependent form by clicking on the above created CMS module and then clicking on the Sub Module icon:  in the SUB MODULES tab.
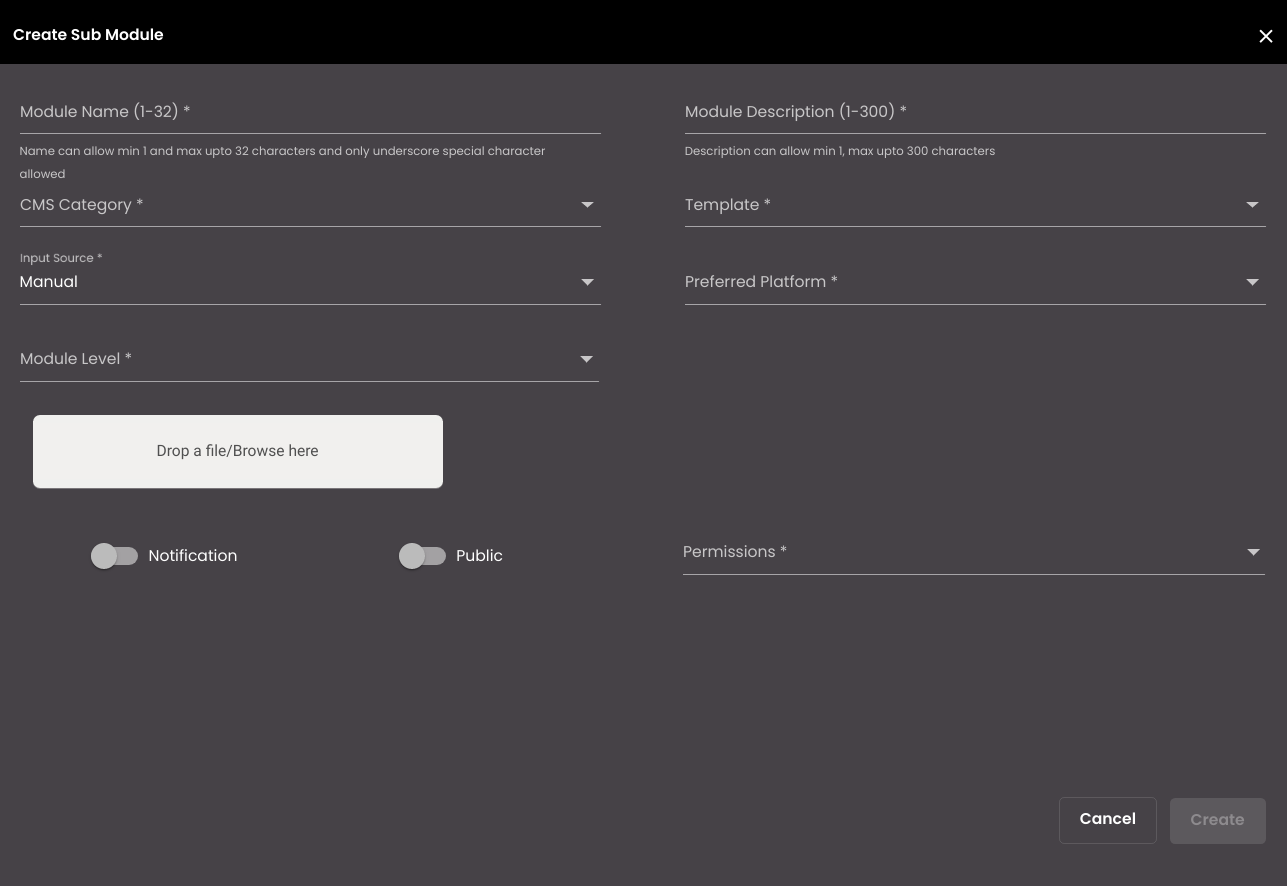
The Create Sub Module dialog displays similar fields as in the Create Module dialog with additionally displaying the Module Level field to select if it has to be a Sub Module or Dependent Form. On creation, these sub modules and dependent forms are displayed in the mobile app. Similar to build forms in module creation, you can create build forms for sub modules and dependent forms by clicking on the Build Form icon: .
To edit an existing CMS sub module or dependent form, select it from the list and click the corresponding Edit icon: .
To delete a CMS sub module or dependent form, select it from the list and click the corresponding Delete icon: .
Likewise, to export a CMS sub module or dependent form, select it from the list and click the corresponding Export icon: . The CMS sub module or dependent form is downloaded as JSON code on your computer.
To import a CMS sub module or dependent form, on the right-hand side of the CMS sub module screen, click the Import icon: . From the Select File option, select the JSON file for a previously exported CMS sub module or dependent form. If required, change the properties in the General Properties tab.
Note
If the imported CMS sub module or dependent form has the same Module Name as an existing CMS sub module or dependent form in the sub modules or dependent forms list, you need to change the Module Name to one that is not present in the existing sub modules or dependent forms in order to import it.
If the CMS sub module or dependent form has sub modules or dependent forms associated with it, they need to be imported separately.
Also, you can add content by clicking on the Content icon:  in the CONTENTS tab. On creation, these contents are displayed in the mobile app.