Create an Adapter
In the top left-hand corner of the main dashboard screen, click the Manage icon:
 .
.On the Manage panel, click Data Pipeline
 .
.On the right-hand side of the Adapters screen, click the Adapter icon:
 .
.In the bar near the top of the Adapters screen, if you want to select an icon that can be used to indicate the meaning of the adapter then click the Icons button:
 .
.Click newAdapter and enter a descriptive name for the adapter. Click the ‘tick’ icon to confirm the name.
Click the more icon:
 .
.Configure the following general settings as required in the more panel:
Setting
Description
Description
An optional description of the adapter.
Version
Optional version information.
Tags
One or more optional descriptive tags for the Adapter. Hit Enter on the keyboard after typing the tag descriptor to add it to the list.
Tag
Description
PA or VMD
Used to generate content reports for this adapter. Enter PA tag for public announcement or VMD tag for variable message display. For more information, see Create a content report.
webhooks
Used to push data seamlessly without access tokens using this adapter. For more information, see API Keys.
sms
Used to send SMS based event notifications. For more information, see Create a SOP Template.
Domain Name
Name of the domain to which the adapter is to be associated with.
Configuration Logs
If enabled, the logs are generated when saving and previewing the data.
Press the Proceed button to save this configuration information.
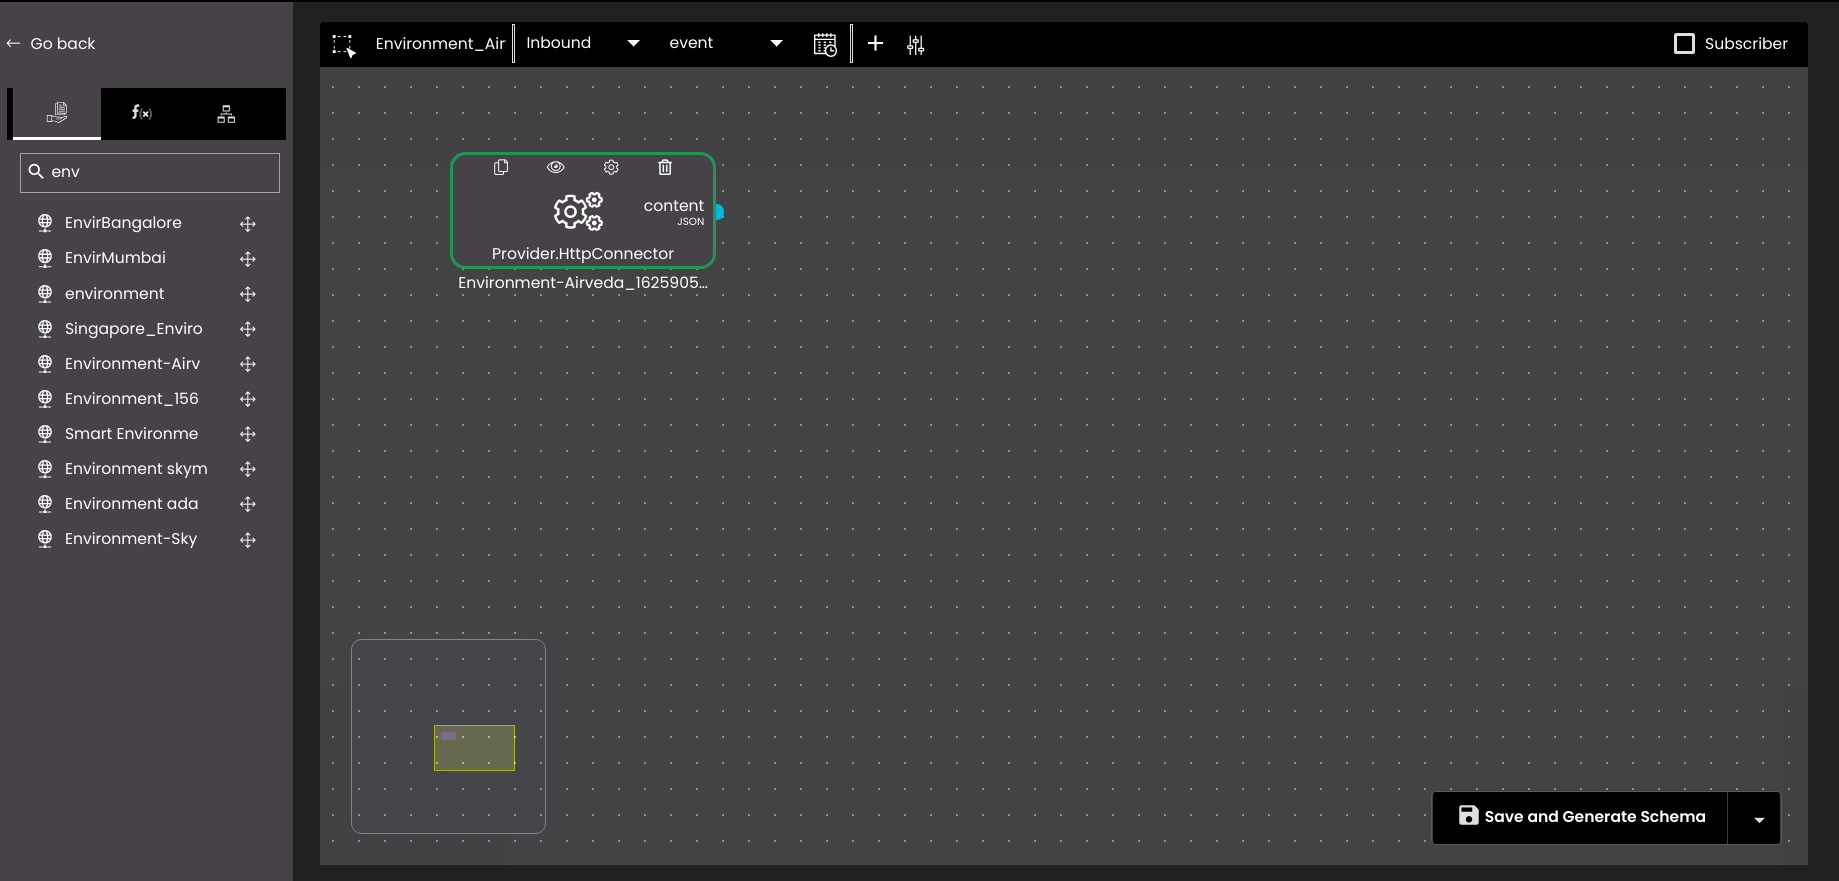
In the drop-down list-box beside the adapter name, select whether this is to an Inbound or an Outbound adapter. Depending on the adapter type, edit the corresponding settings as indicated below.
An Outbound Adapter is used to send data from the Quantela plaform to an external system, or to invoke an action on an external system.
Note
In order to generate content reports you need to create an outbound adapter. For more information, see Create a content report.
In order to send SMS based event notifications you need to create an outbound adapter. For more information, see Create a SOP Template.
If this adapter is to receive events that are published by another connector like Socket or MQTT then tick the Subscriber box and configure the subscriber:
Connector - select the connector that is publishing the data. If the Socket connector is selected then all the socket connectors would be displayed and if the MQTT connector is selected then all the MQTT connectors would be displayed.
Dataset inputs mapping - for each of the inputs in the receiving adapter, select a corresponding output from the publishing connector.
If the adapter is to trigger asynchronous events that can be consumed by external applications then tick the Publisher box.

If this adapter is to be invoked automatically at a specific time interval then click the Scheduler icon and configure the scheduler:

Slide the Scheduler switch to the right to enable the scheduler.
Enter a name for the scheduler.
Specify the schedule period using the standard Cron time string format. For example, "30 * * * *" can invoke the adapter at 30 minutes past the hour, every hour. "*/15 * * * *" can run every 15 minutes. "0 13 * * 1" can execute at 1pm every Monday.
Note that if the adapter is to be scheduled then it cannot contain unresolved input parameters. The adapter cannot be invoked in the context of a dashboard widget which can provide input parameters, so it must be able to execute independently.
Click Save and Generate Schema to create the Adapter with schema or Save Adapter to create the Adapter without schema.