Create a distribution rule
In the top left-hand corner of the main dashboard screen, click the Manage icon:
 .
.On the Manage panel, click Automation
 .
.On the right-hand side of the Distribution Rules screen, click the Distribution Rule icon:
 .
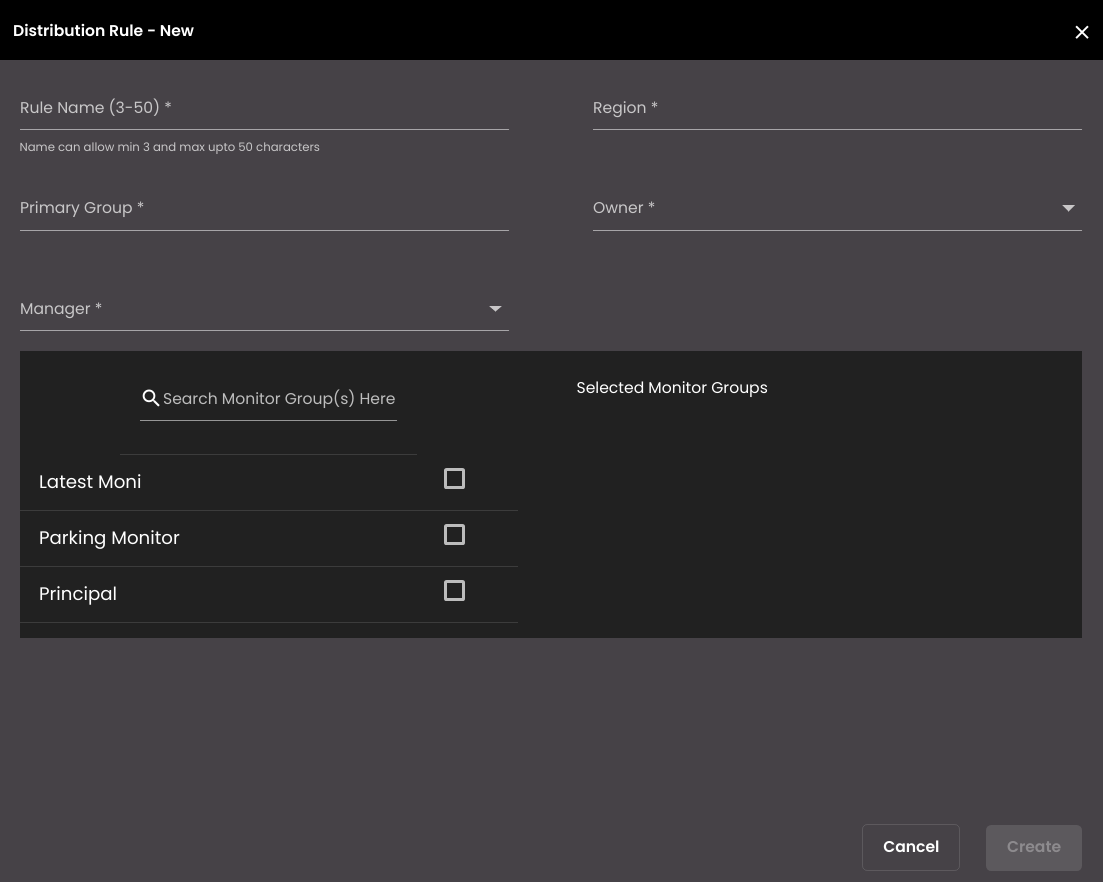
.Enter a descriptive Rule Name for the distribution rule. This is the name that will be shown in the list of distribution rules.
Note
It must be 3-50 characters only.
Select a pre-configured geographical Region from the list. The rule will only be applied to events that originate from this region.
Select a pre-configured group from the list to be the Primary Group. This is the group of users who can complete the event task.
Select an admin user from the primary group to be the Owner. This is the user who will initially receive the notification, and he/she can then assign it to other members of the group.
Select an admin user from the primary group to be the Manager. If the task has not been completed within the specified Service Level Agreement (SLA) time period then it will be escalated to this user.
Select a pre-configured group from the list to be the Monitor Group. This is the group of users who can monitor the progress of the event task, but they will not be able to complete the task.
Press the Create button at the bottom of the screen to save the distribution rule.